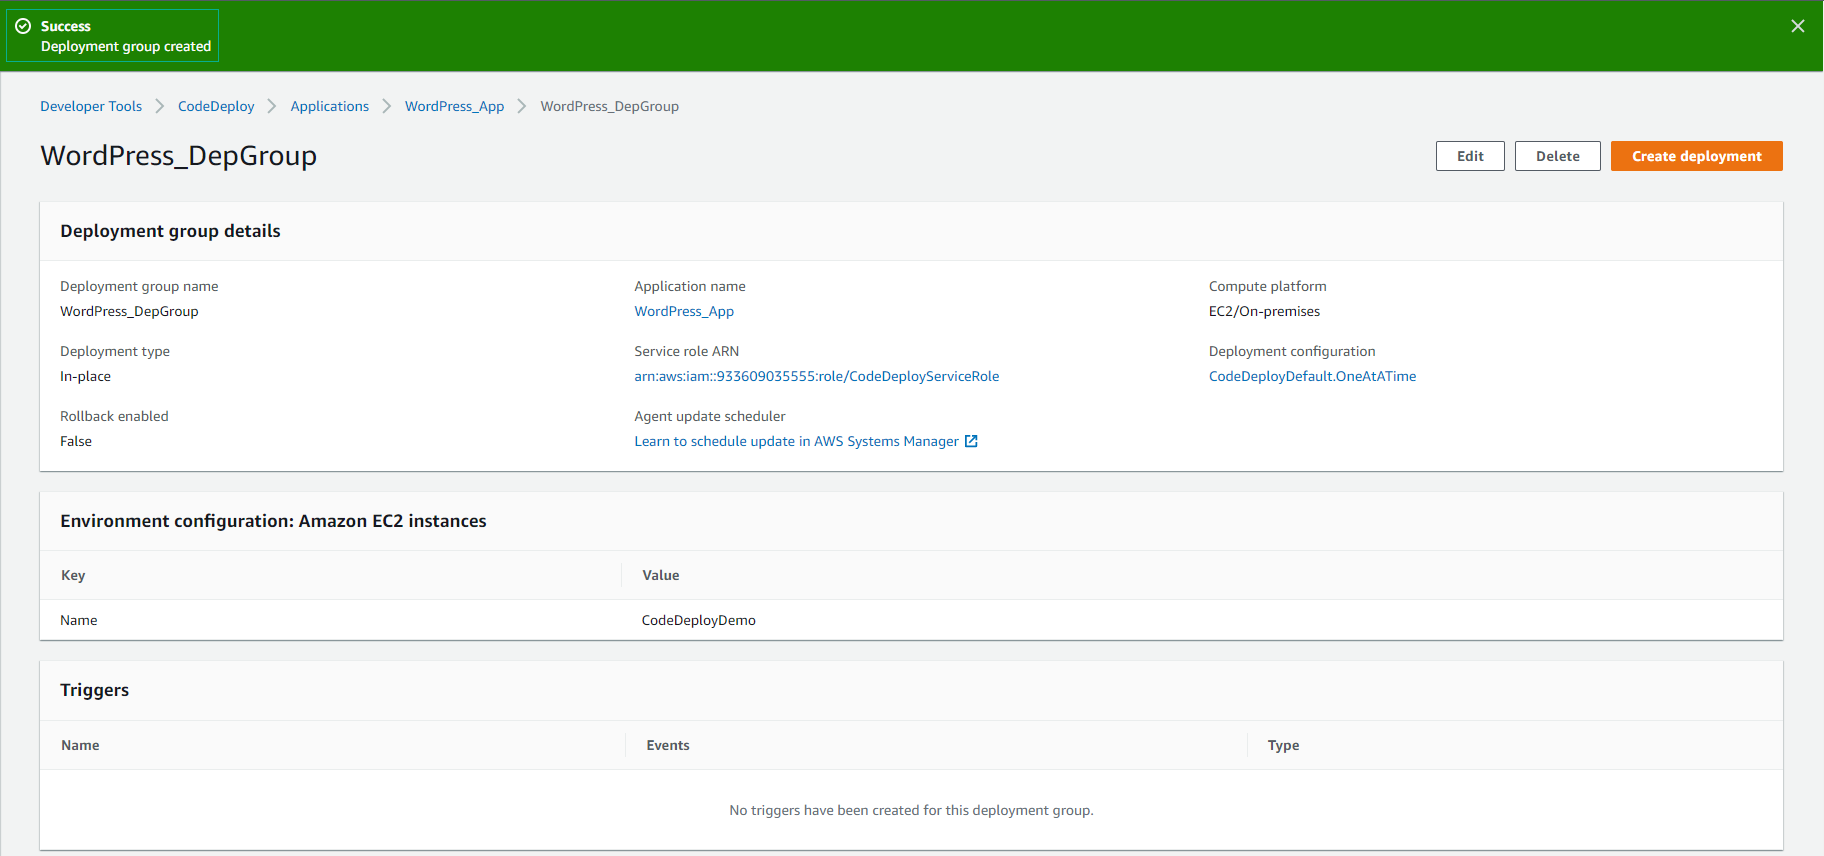
Create deployment group
- File structure for deployment:
/tmp/
  |--WordPress/
      |-- appspec.yml
      |-- scripts/
      |    |-- change_permissions.sh
      |    |-- create_test_db.sh
      |    |-- install_dependencies.sh
      |    |-- start_server.sh
      |    |-- stop_server.sh
      |-- wp-admin/
      |    |-- (various files...)
      |-- wp-content/
      |    |-- (various files...)
      |-- wp-includes/
      |    |-- (various files...)
      |-- index.php
      |-- license.txt
      |-- readme.html
      |-- (various files ending with .php...)
- Create an application for CodeDeploy:
cd /tmp/WordPress
aws deploy create-application --application-name WordPress_App
- You must configure the CLI to use the command (by using
aws configurecreated in step 2.1 Create Access Key).

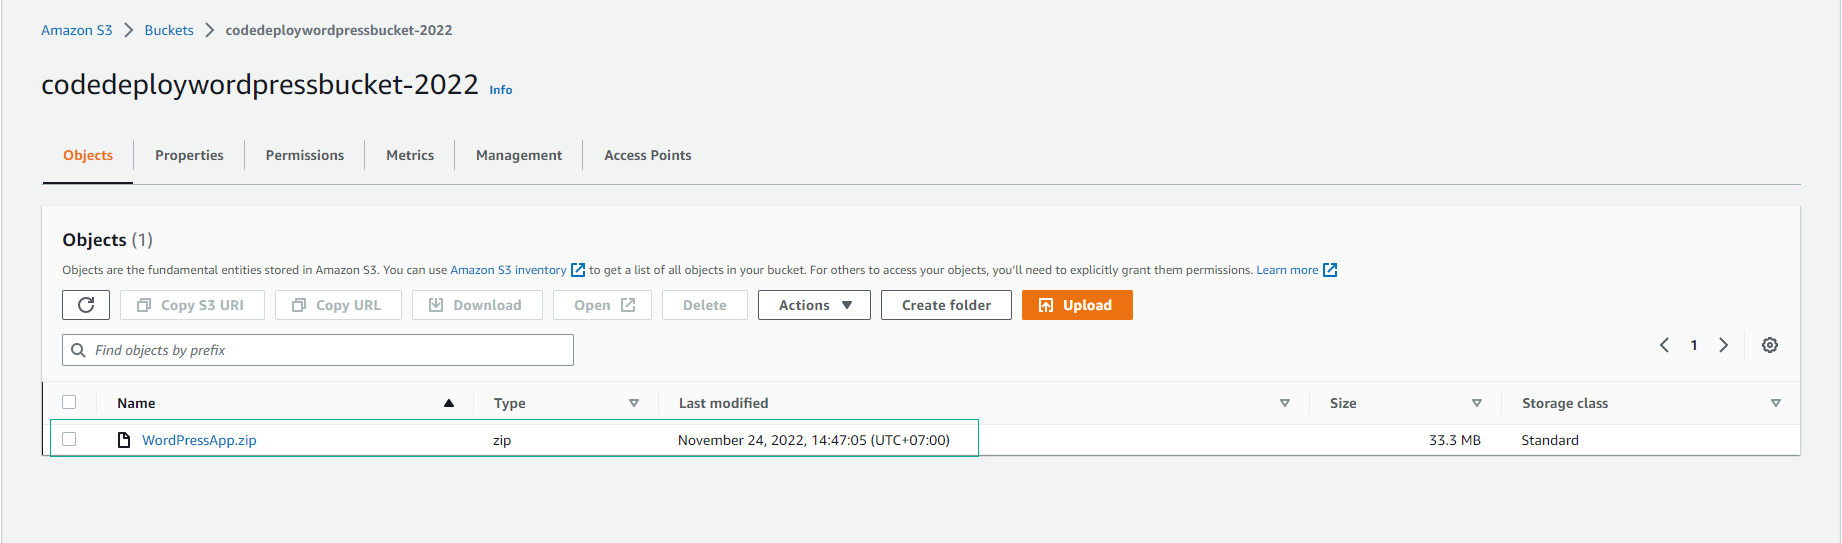
- Upload the CodeDeploy revision to Amazon S3.
aws deploy push \
  --application-name WordPress_App \
  --s3-location s3://bucketname/WordPressApp.zip \
  --ignore-hidden-files
- Check the S3 bucket to see the push result.
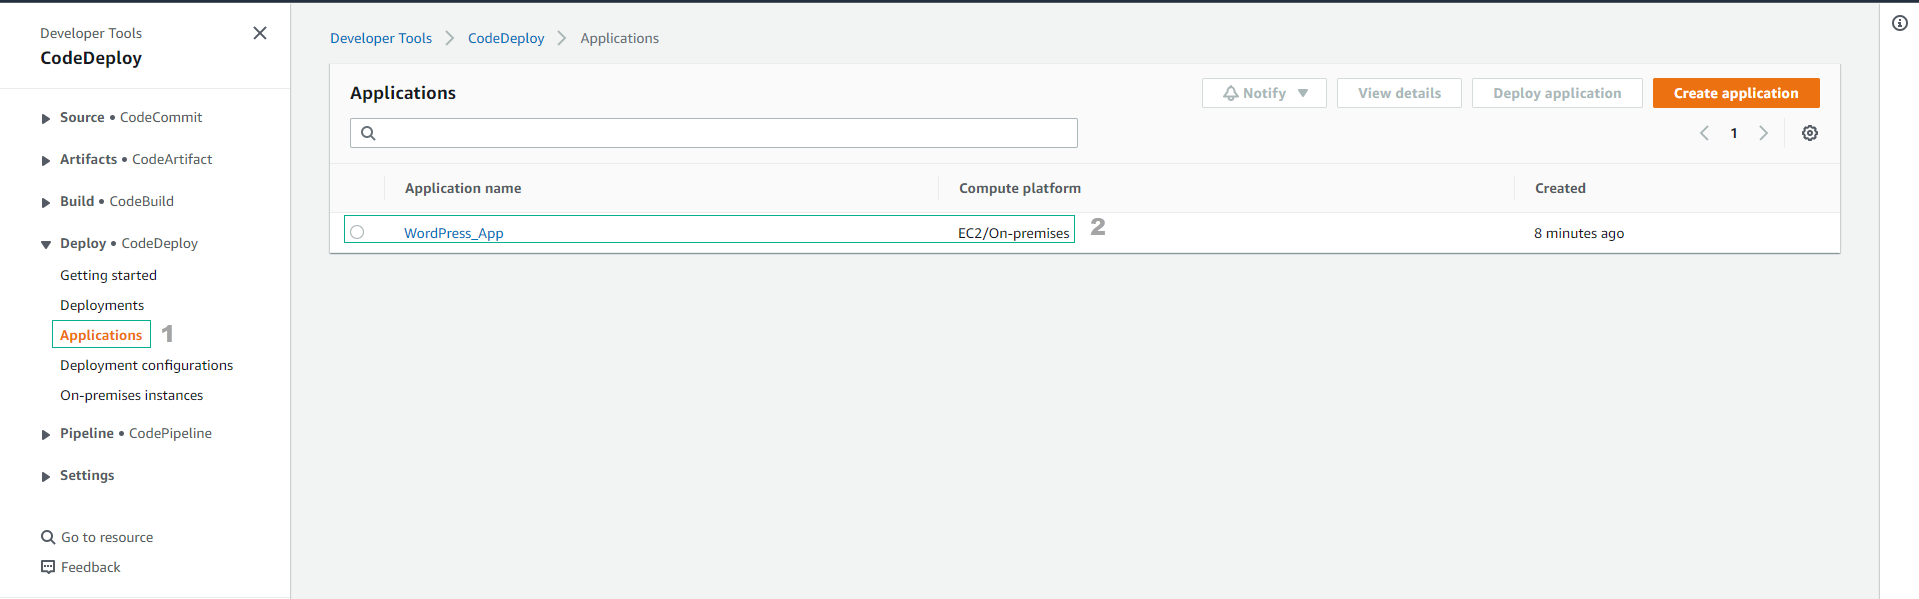
Access the CodeDeploy interface:
- Select Applications
- Select WordPress_App
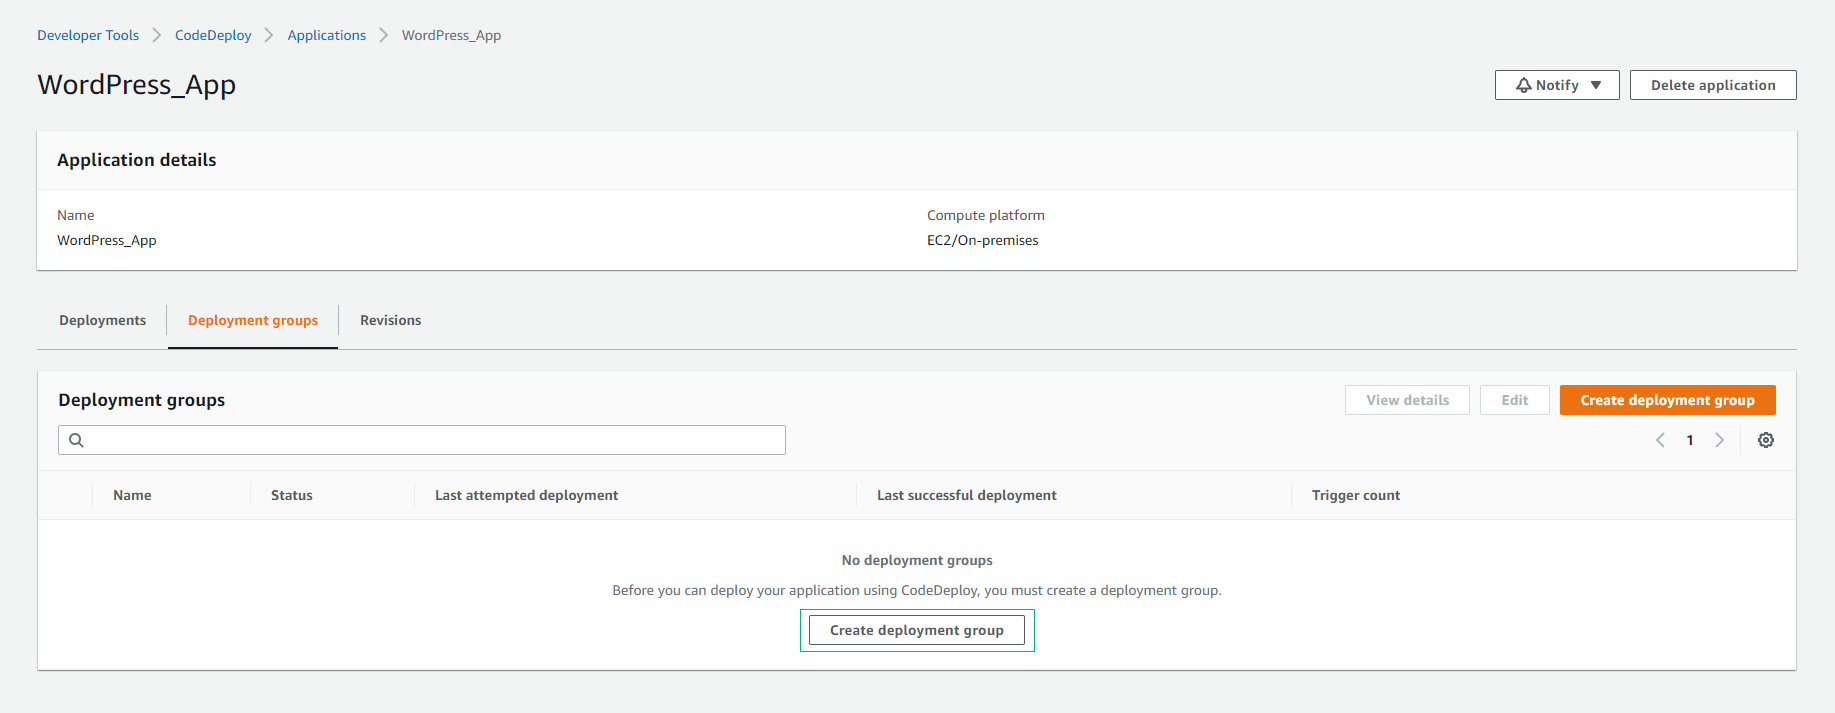
In the Application interface:
- Select Deployment groups
- Select Create deployment group
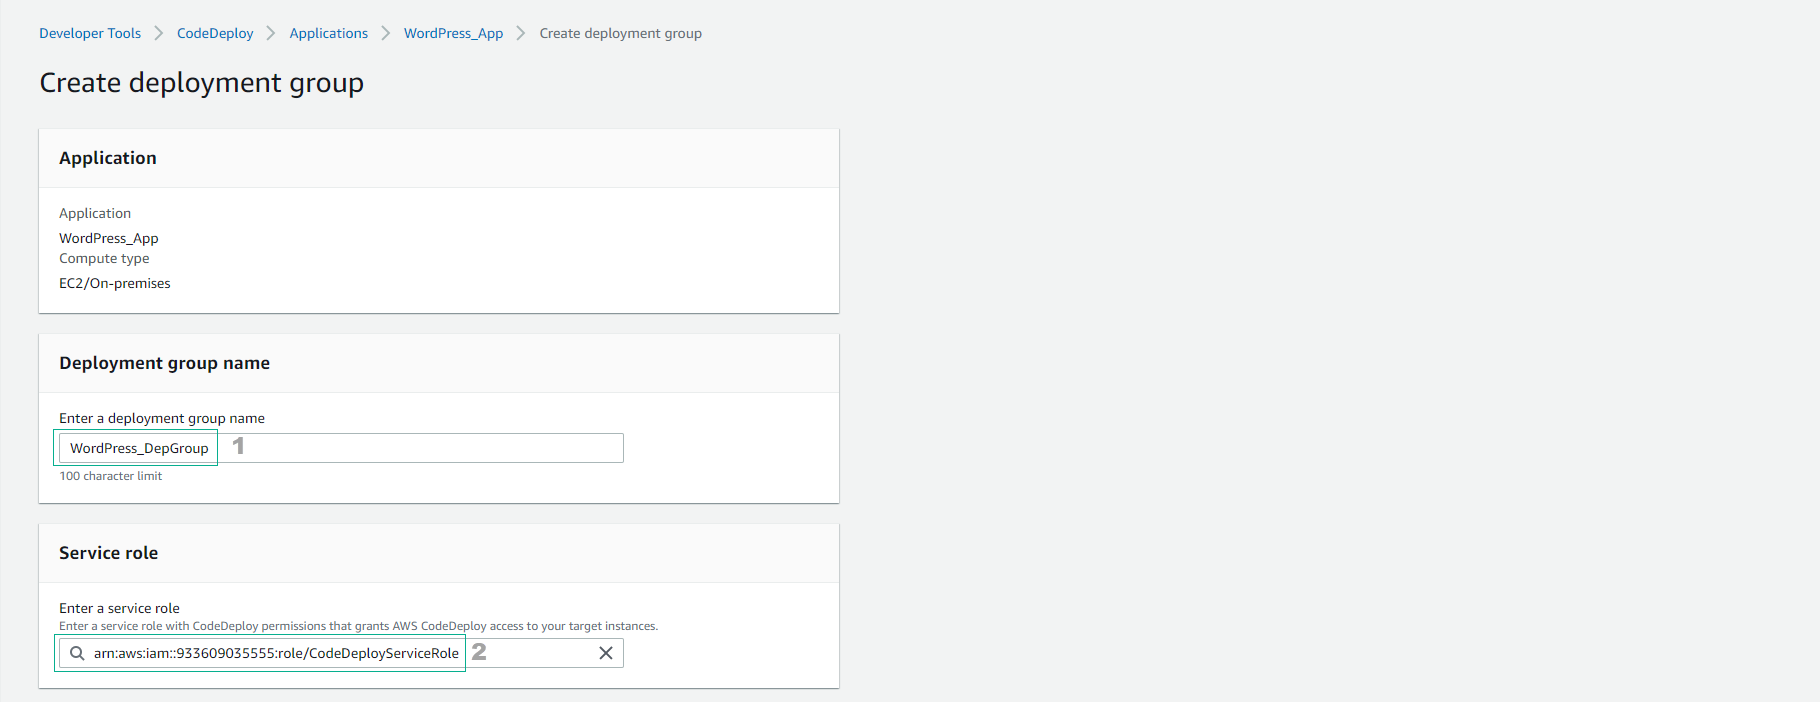
- Enter the deployment group name. Select Service role.
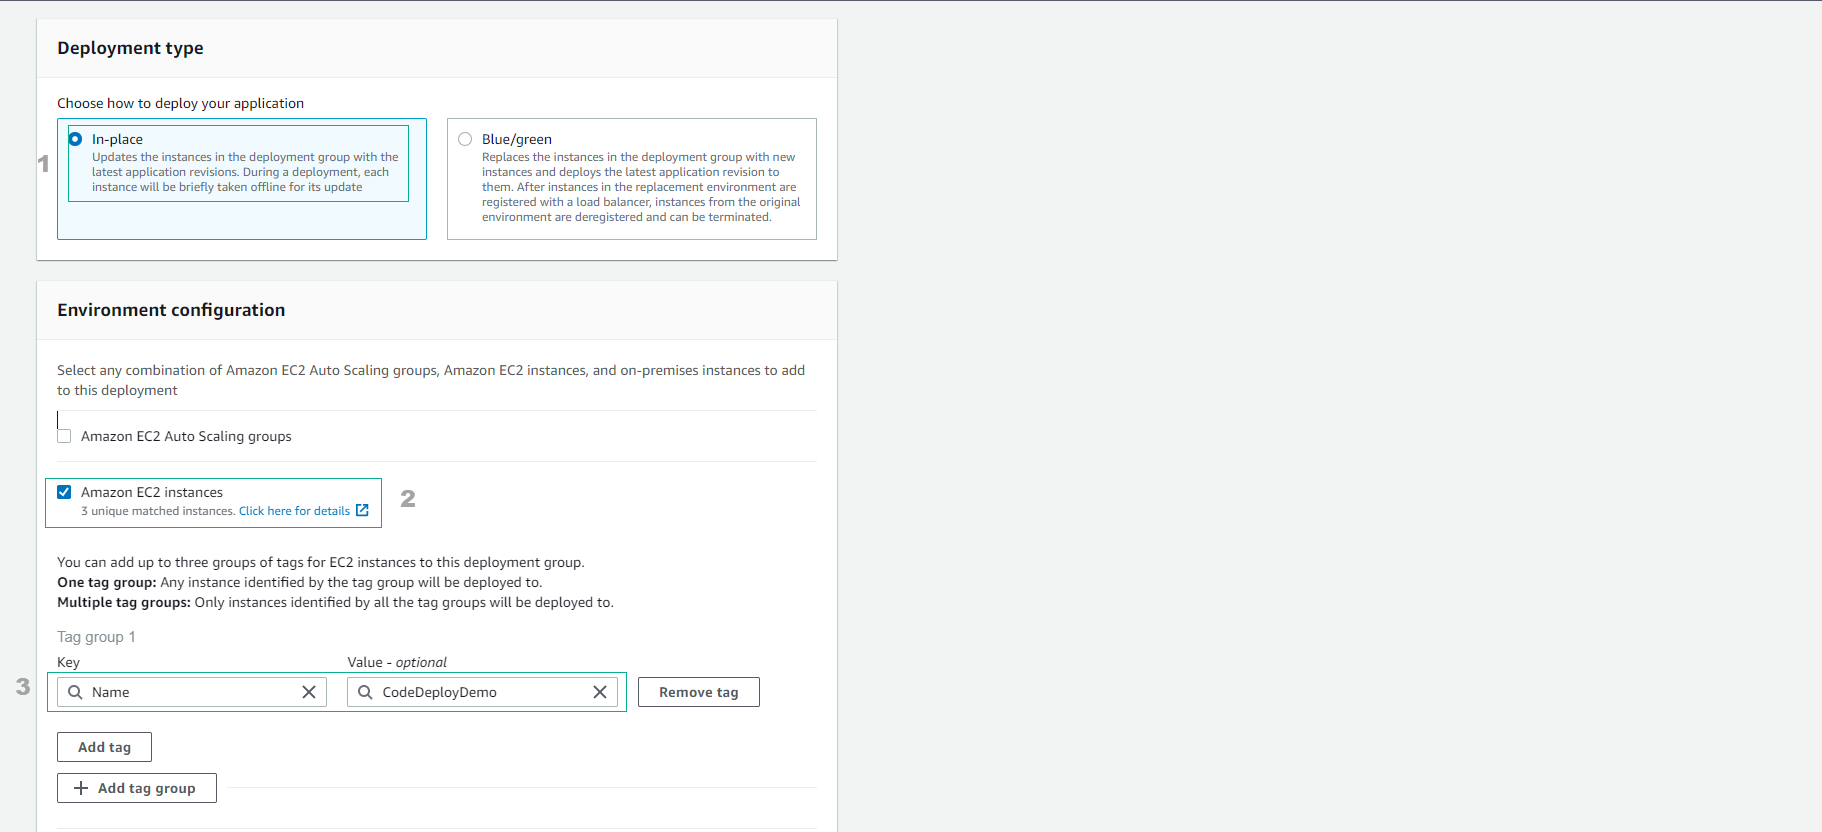
- In the Deployment type section:
- Select In-place
- For Environment configuration, select Amazon EC2 instances
- Enter key
- Enter value.
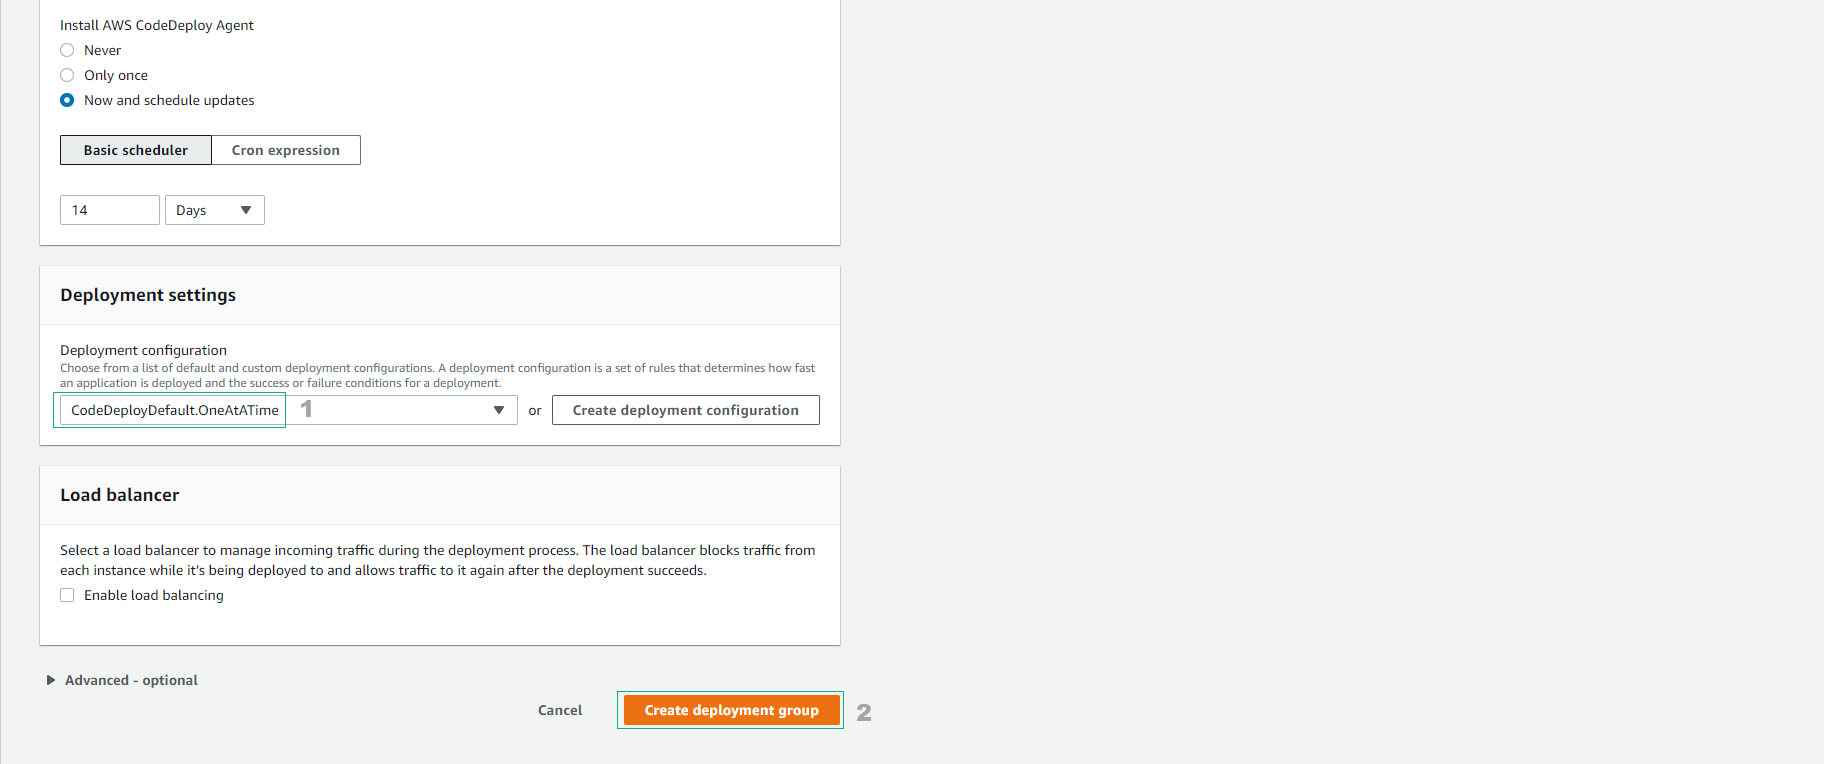
- Select Deployment as CodeDeployDefault.OneAtATime
- Uncheck Enable load balancing
- Select Create deployment group
- Deployment group created successfully.